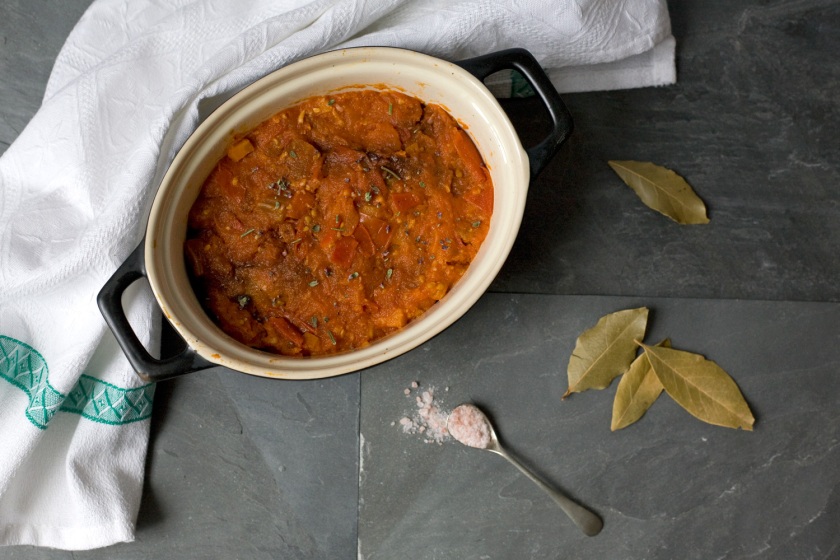
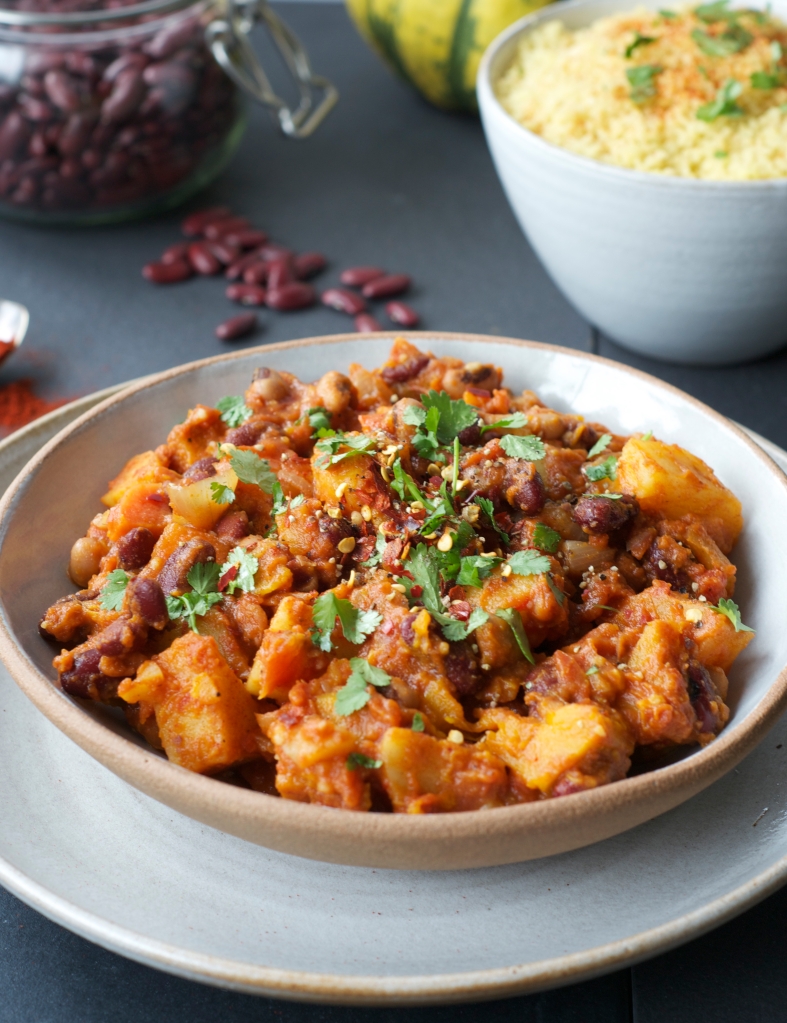
You know when you’re absolutely shattered and you can’t be bothered to cook? I totally get it! We’ve got a one pot dish that isn’t too involved, that will mean you can serve up something warm and comforting on these dark autumnal evenings. Plus this will serve up to 6 people, so you can either eat it for a couple of nights or is great if you got a few more mouths to feed.
Last weekend was a busy one, in fact I’ve been counting down the days to this weekend to recover from it! It was busy. Amy was here for the weekend and we spent Saturday and Sunday in the kitchen working on some exciting things! Then we had to cook dinner….the absolute last thing we wanted to do was cook a meal for 5 hungry people, so we needed something easy. This is what we created – a warm comforting stew that is tasty and won’t have you slaving in the kitchen for hours.
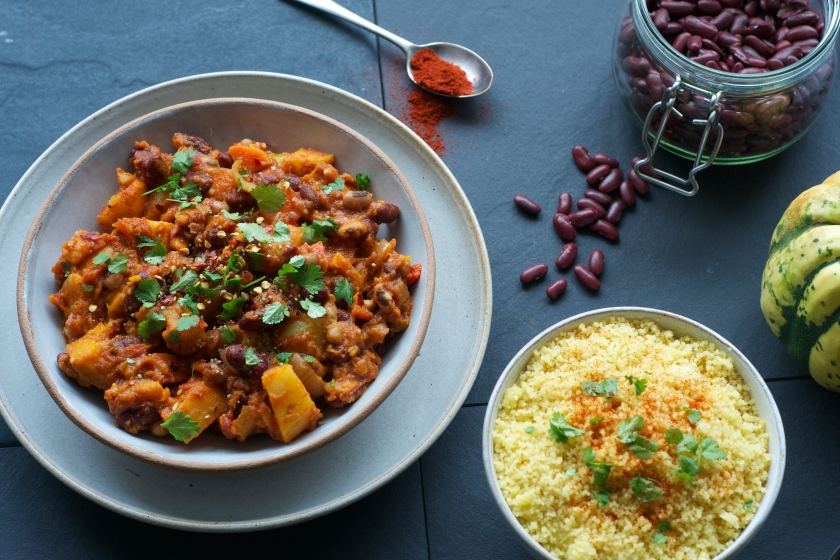
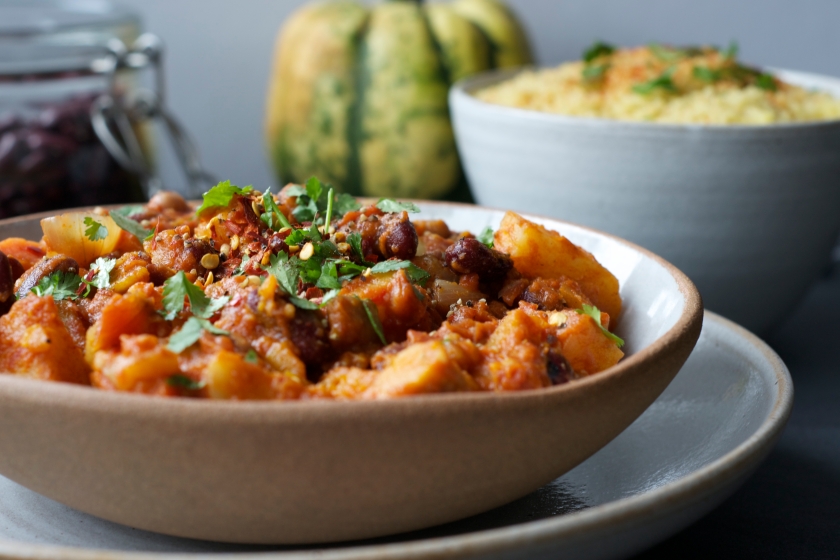
Spicy Squash & Kidney Bean Stew
Olive oil
2 onions
2 garlic cloves
3 bell or sweet peppers (chopped)
5 potatoes (chopped into cubes)
2 tins of tomatoes
1 medium squash – I used Kabocha (chopped into chunked)
4 carrots (chopped into chunks)
1 1/2 cups cooked kidney beans (1 tin)
1 1/2 cups cooked black eyed beans (1 tin)
3 tsp cumin
2 tsp smoked paprika
1/2 tsp hot chilli powder
1 tbsp organic tomato ketchup
salt and pepper
- On a medium heat, heat a drizzle of olive oil in a large pan and cook down the onions for 5 minutes until soft.
- Crush the garlic cloves and add to the pan. Add the cumin and paprika and cook for a couple of minutes.
- Add the squash, potatoes, carrots, pepper and beans and coat with the spices. Pour in the tomatoes and bring to the boil. Throw in the chilli powder and ketchup and simmer for 30-40 minutes.
- Season with salt and pepper.
We served it with couscous, mainly because we’d run out of rice, but also because it’s super quick to make. Although, to be honest you could just eat it on its own (although I’m a big fan of double carbing)!
Enjoy this super tasty, warming, throw it in a pan kinda meal that will definitely have you licking your plate (er…I totally don’t do that)!
Peace out.
Veronica x


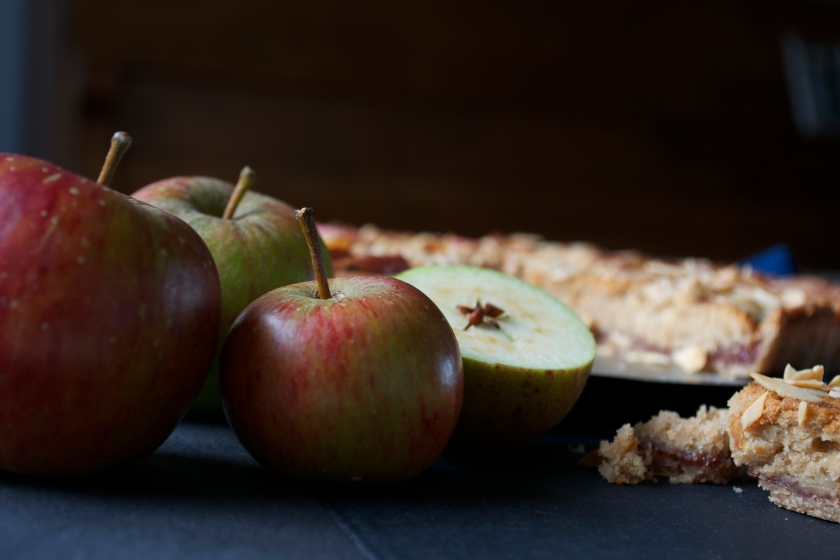
 Whoop whoop it’s apple season and I’m celebrating with this hearty vegan and gluten-free Apple Bakewell Tart.

 Hang on a minute, October?? Is it just me that is freaking out at how quickly this year is going? It seems like everytime I sit down to write a post I’m like ‘Oh my god, where the hell is the year going!’ Well I’m doing it again…. argh!!